Hello World
Let's get this party started
Now, the moment you've all been waiting for...time to build your first Android app!
In addition to finally letting you get your feet wet, this will help us test our install to make sure everything is in proper working order. Be warned, since the software installation will be proven good to go, any errors after this point will most likely be your own fault and you'll no be longer allowed to blame the IDE!
In keeping with tradition, we’ll call our first app “HelloWorld”. Google has provided a walk-through for their own version of Hello World app, but we're going to build our own.
- Open Android Studio (if it's not open already).
- If the Quick Start window opens, select Start a New Android Studio Project:
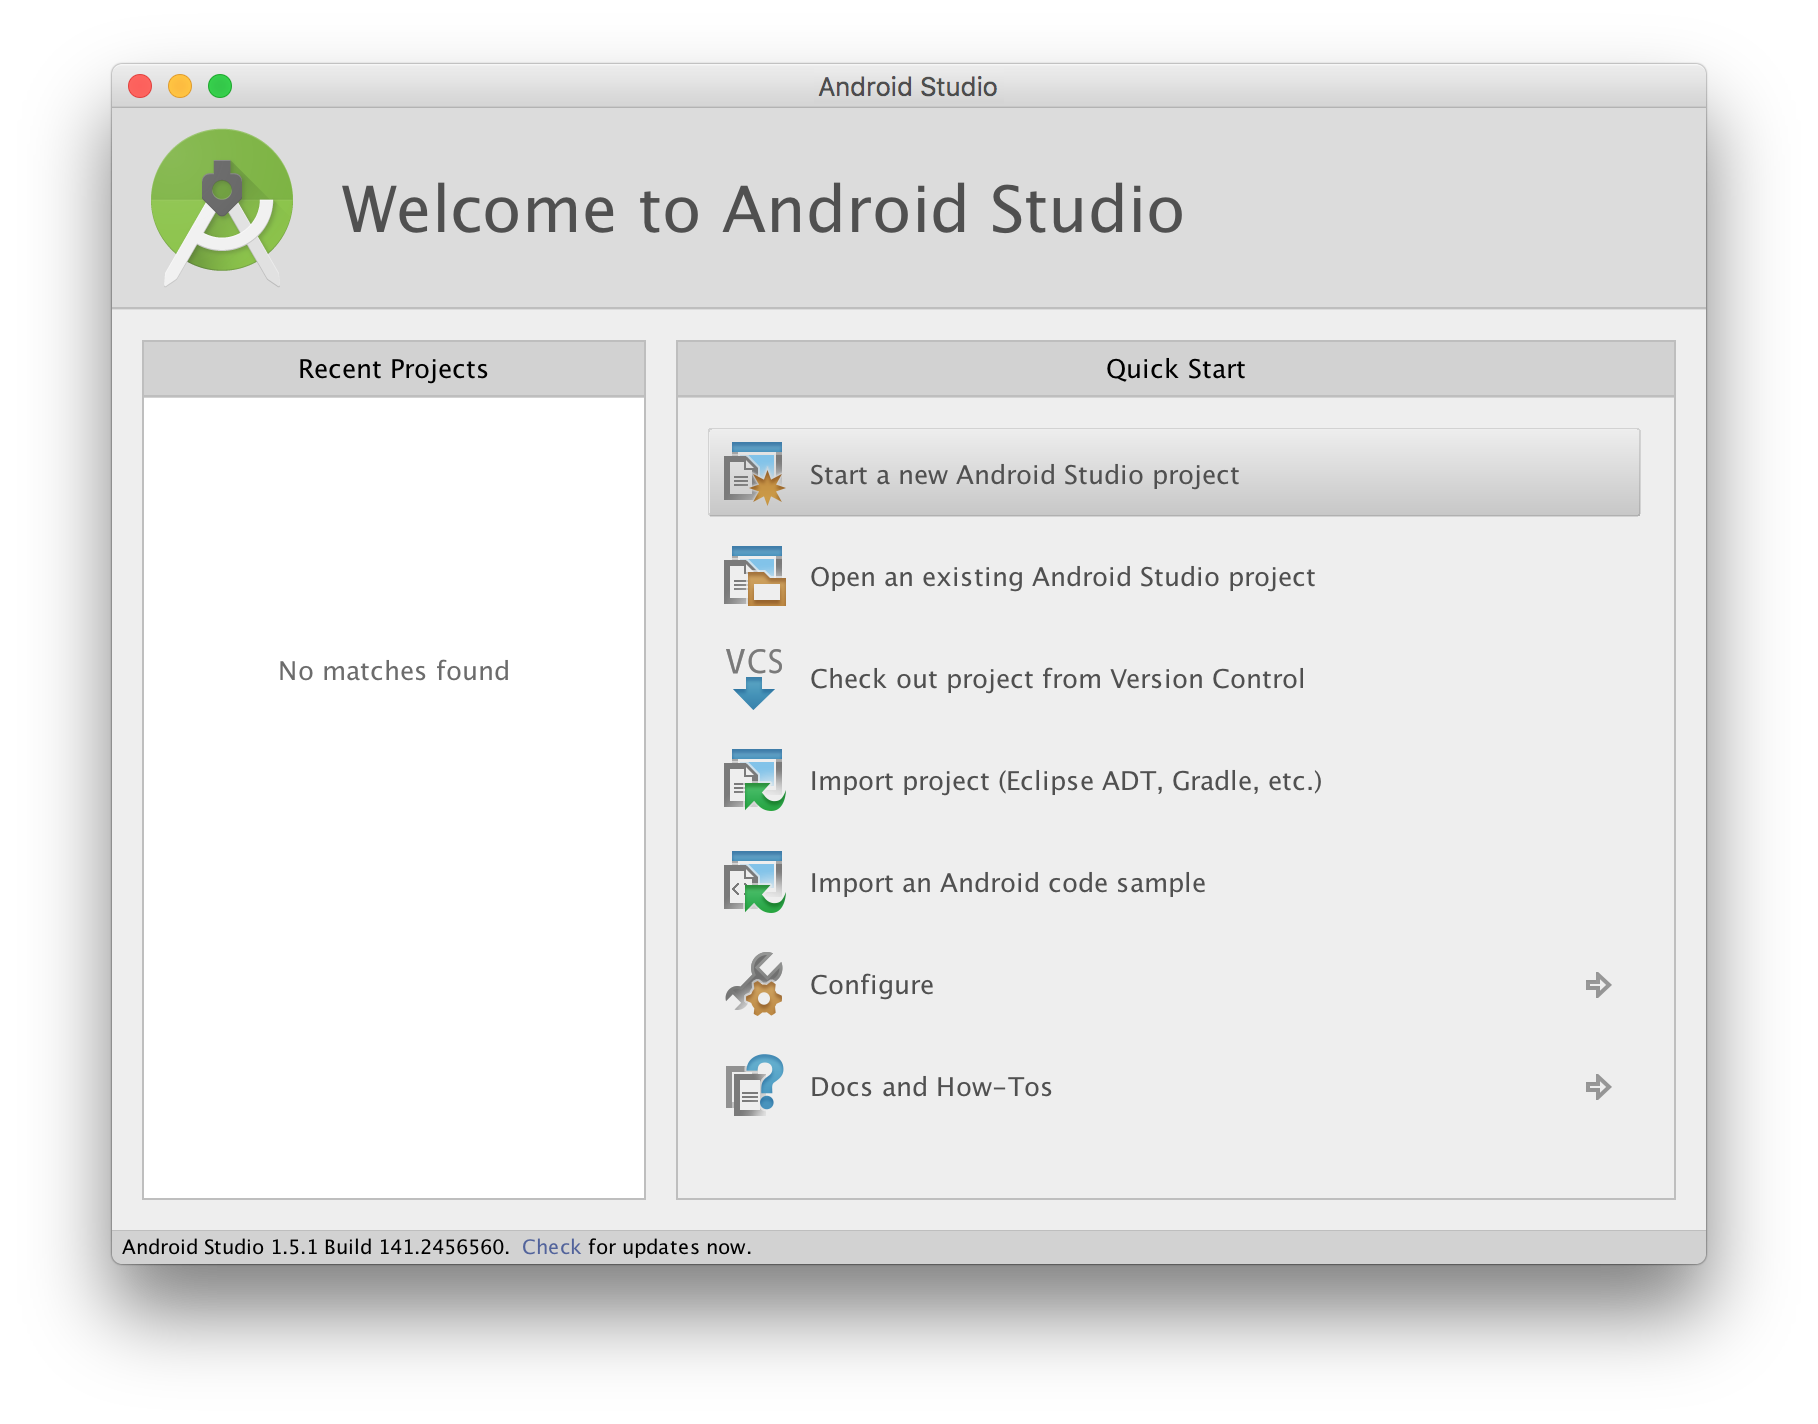
- If the Quick Start dialog doesn't show, or you already have Android Studio open, from the File menu select New Project:
![[screenshot new android application window lab2_1.png]](http://www.pepinonline.com/courses/course/resources/images/file_menu1.png)
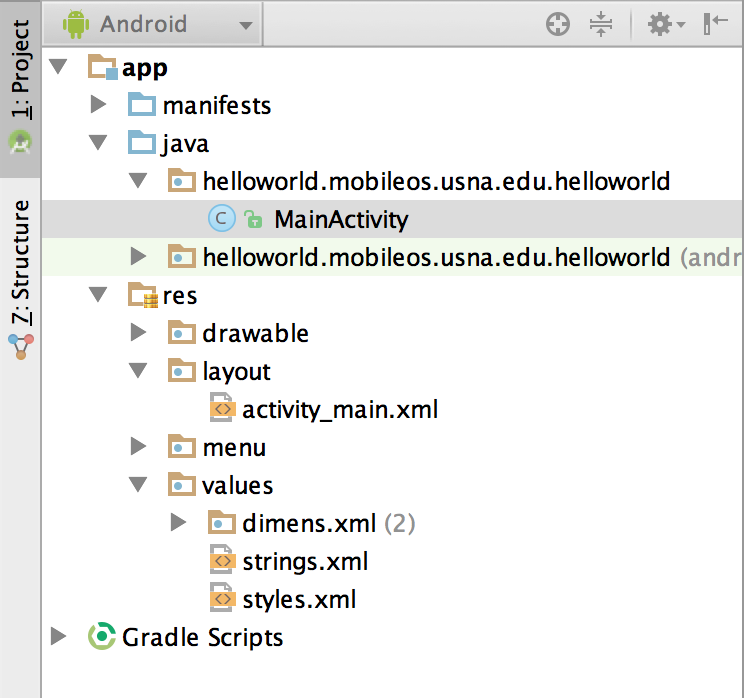
- Fill out the form to match the screenshot below. Notice that in keeping with Java standard practice, the package name is the reverse form of the company domain by default. Once completed, click Next
![[screenshot new android application window lab2_2.png]](http://www.pepinonline.com/courses/course/resources/images/new_project1.png)
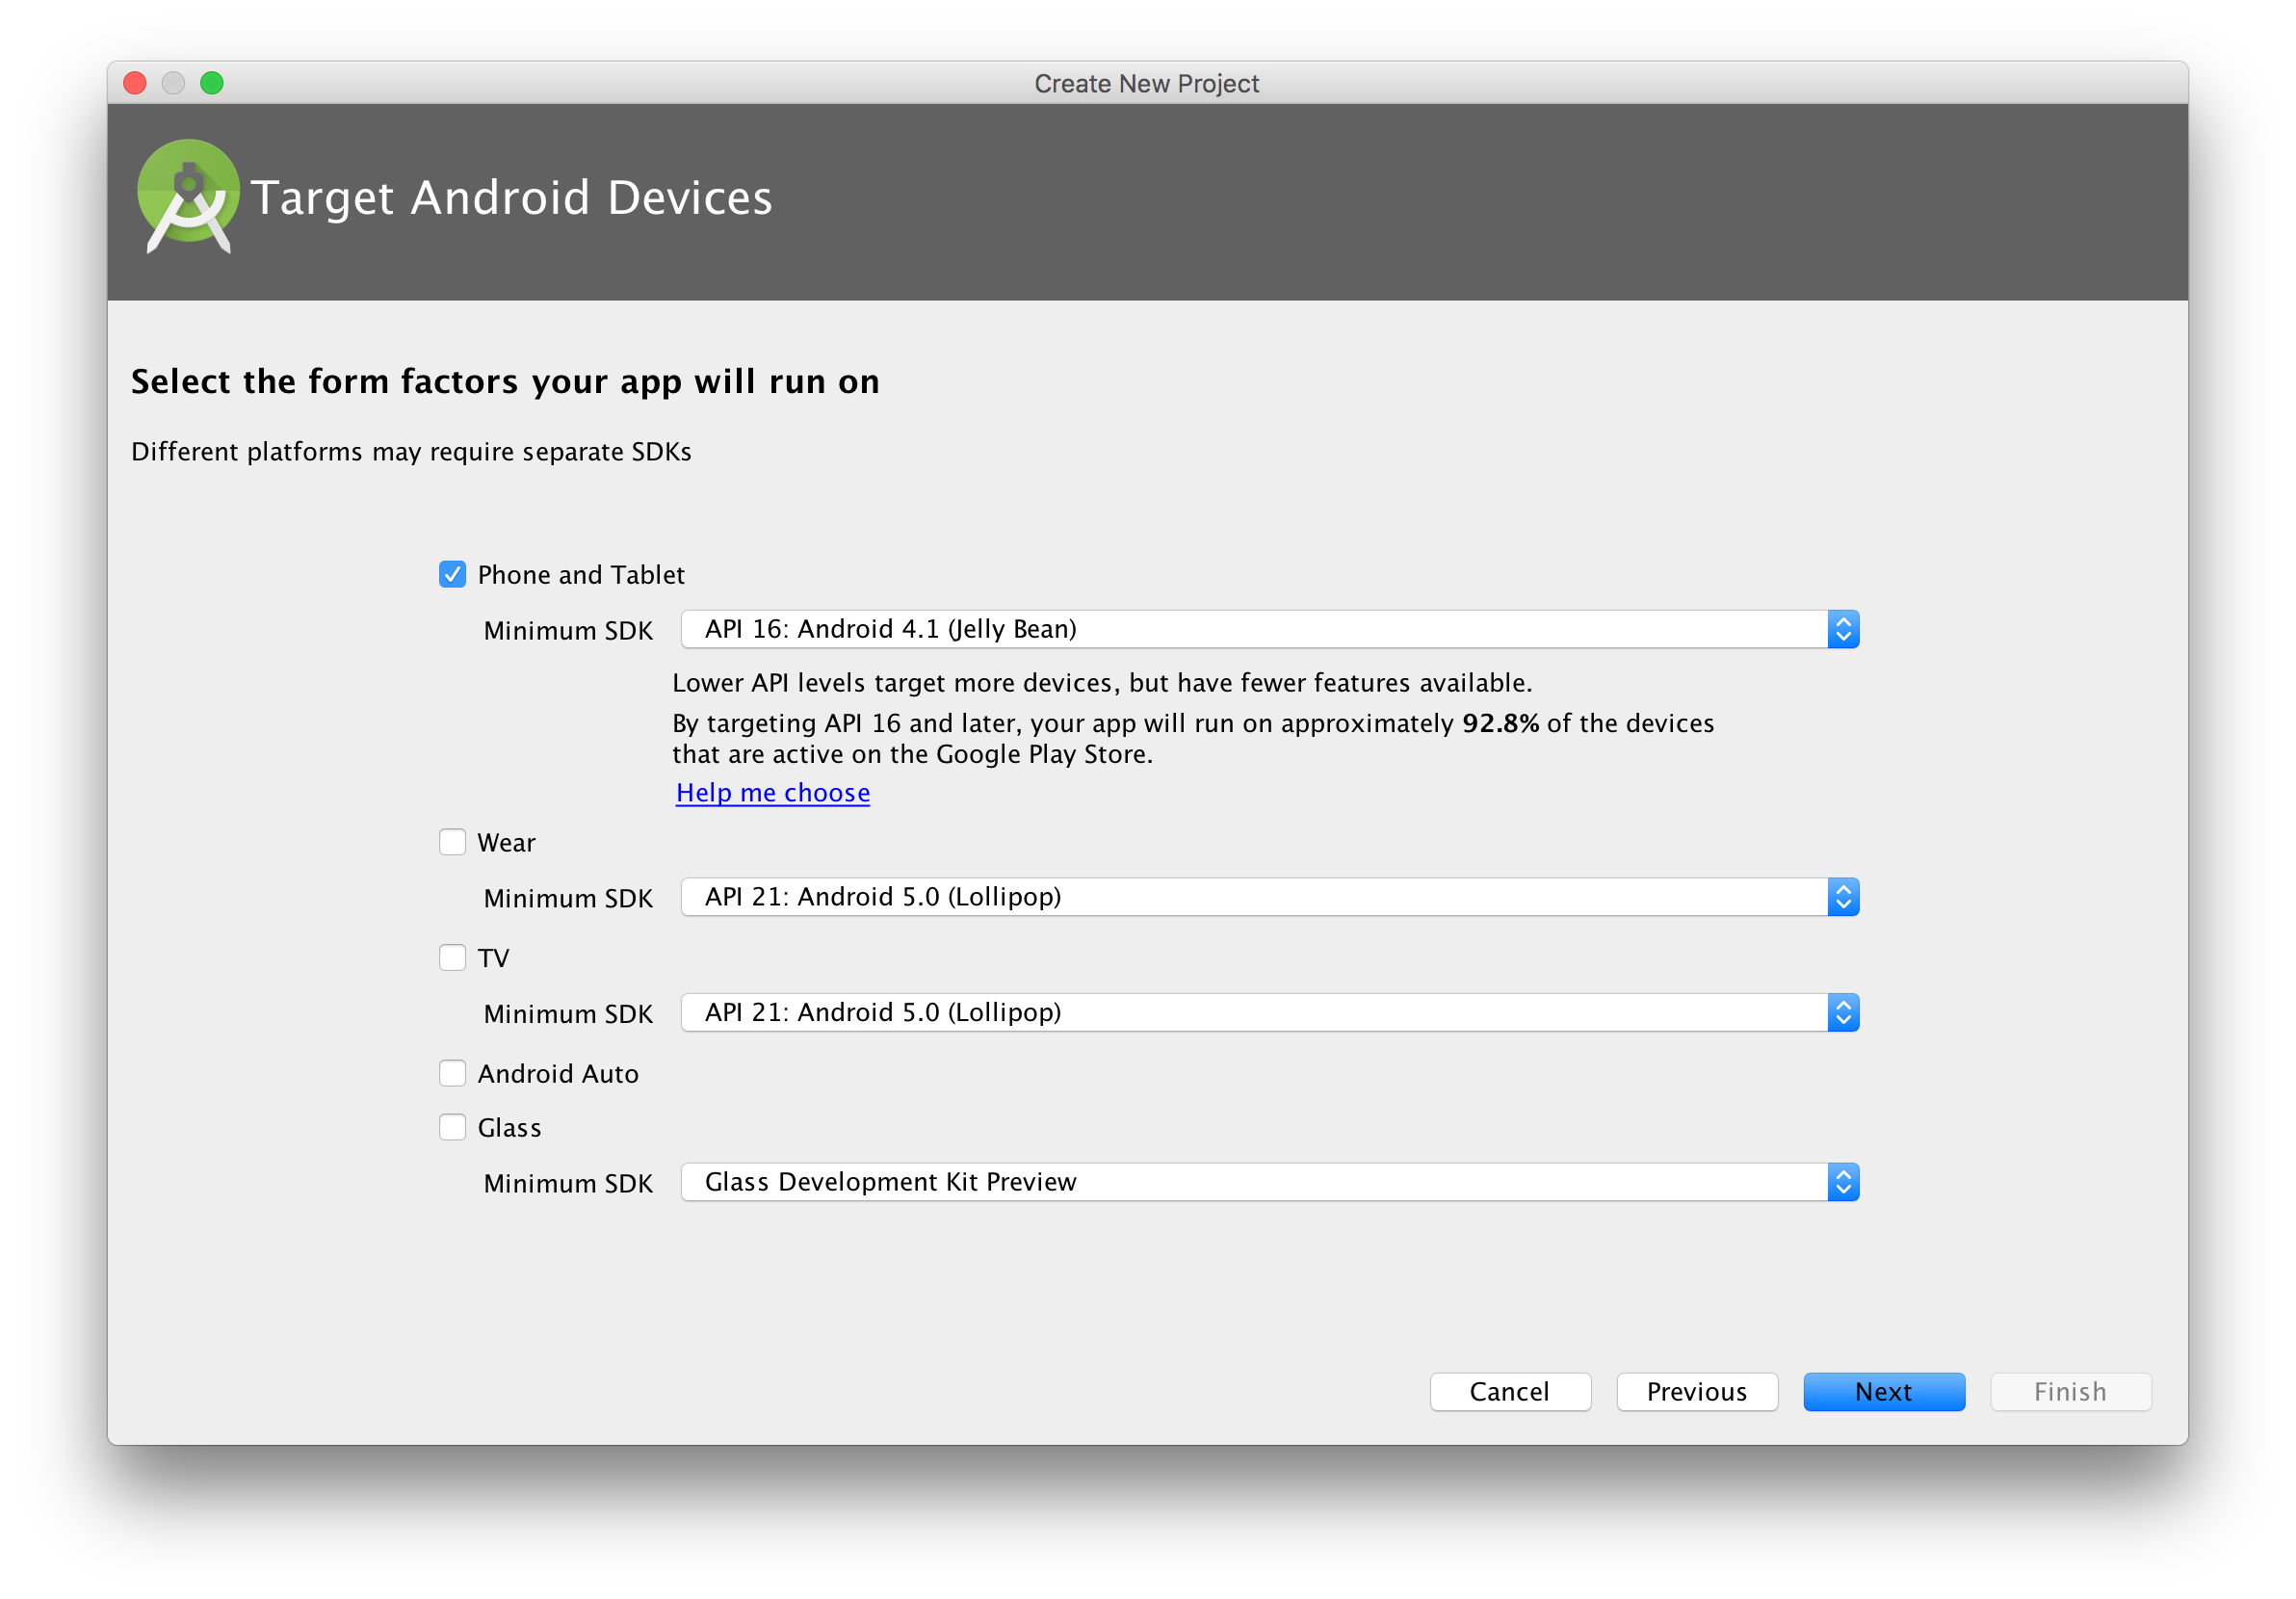
- Select Phone and Tablet, set the Minimum SDK to API 16 (Jelly Bean). Why Jelly Bean? Doing so will allow us to write an app that will work on nearly all Android devices currently in use. Click Next
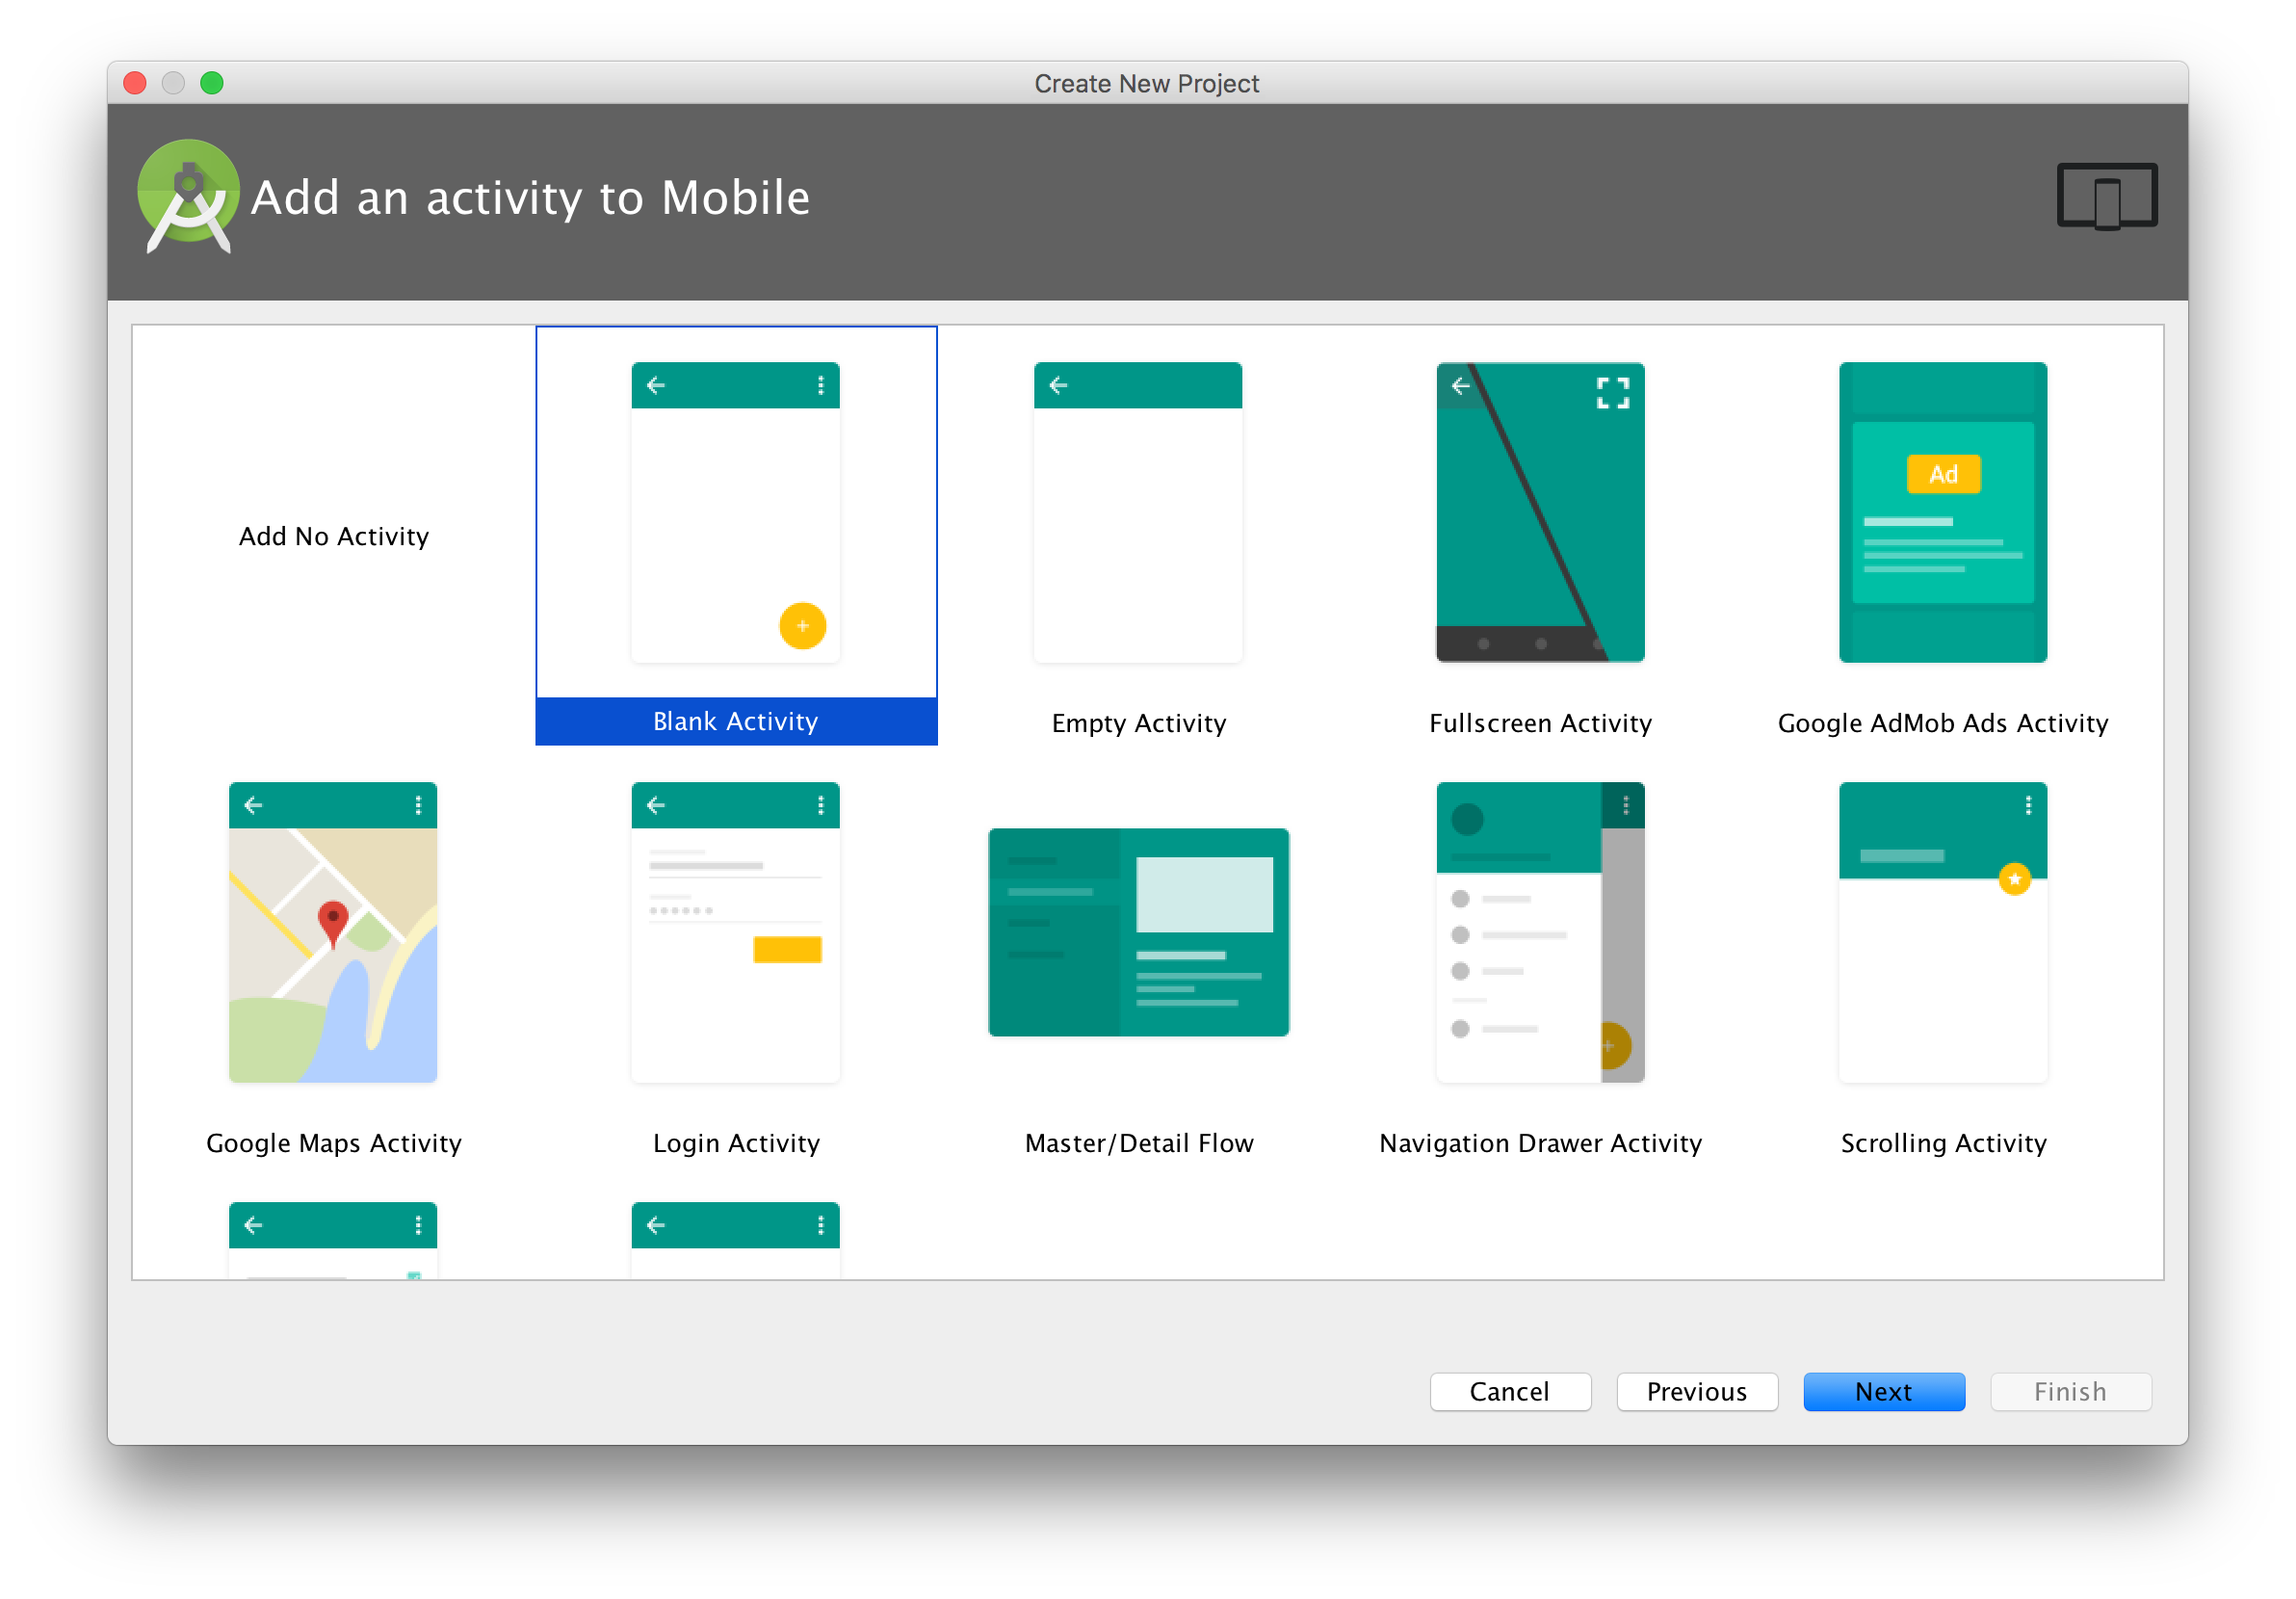
- Select Blank Activity and click Next
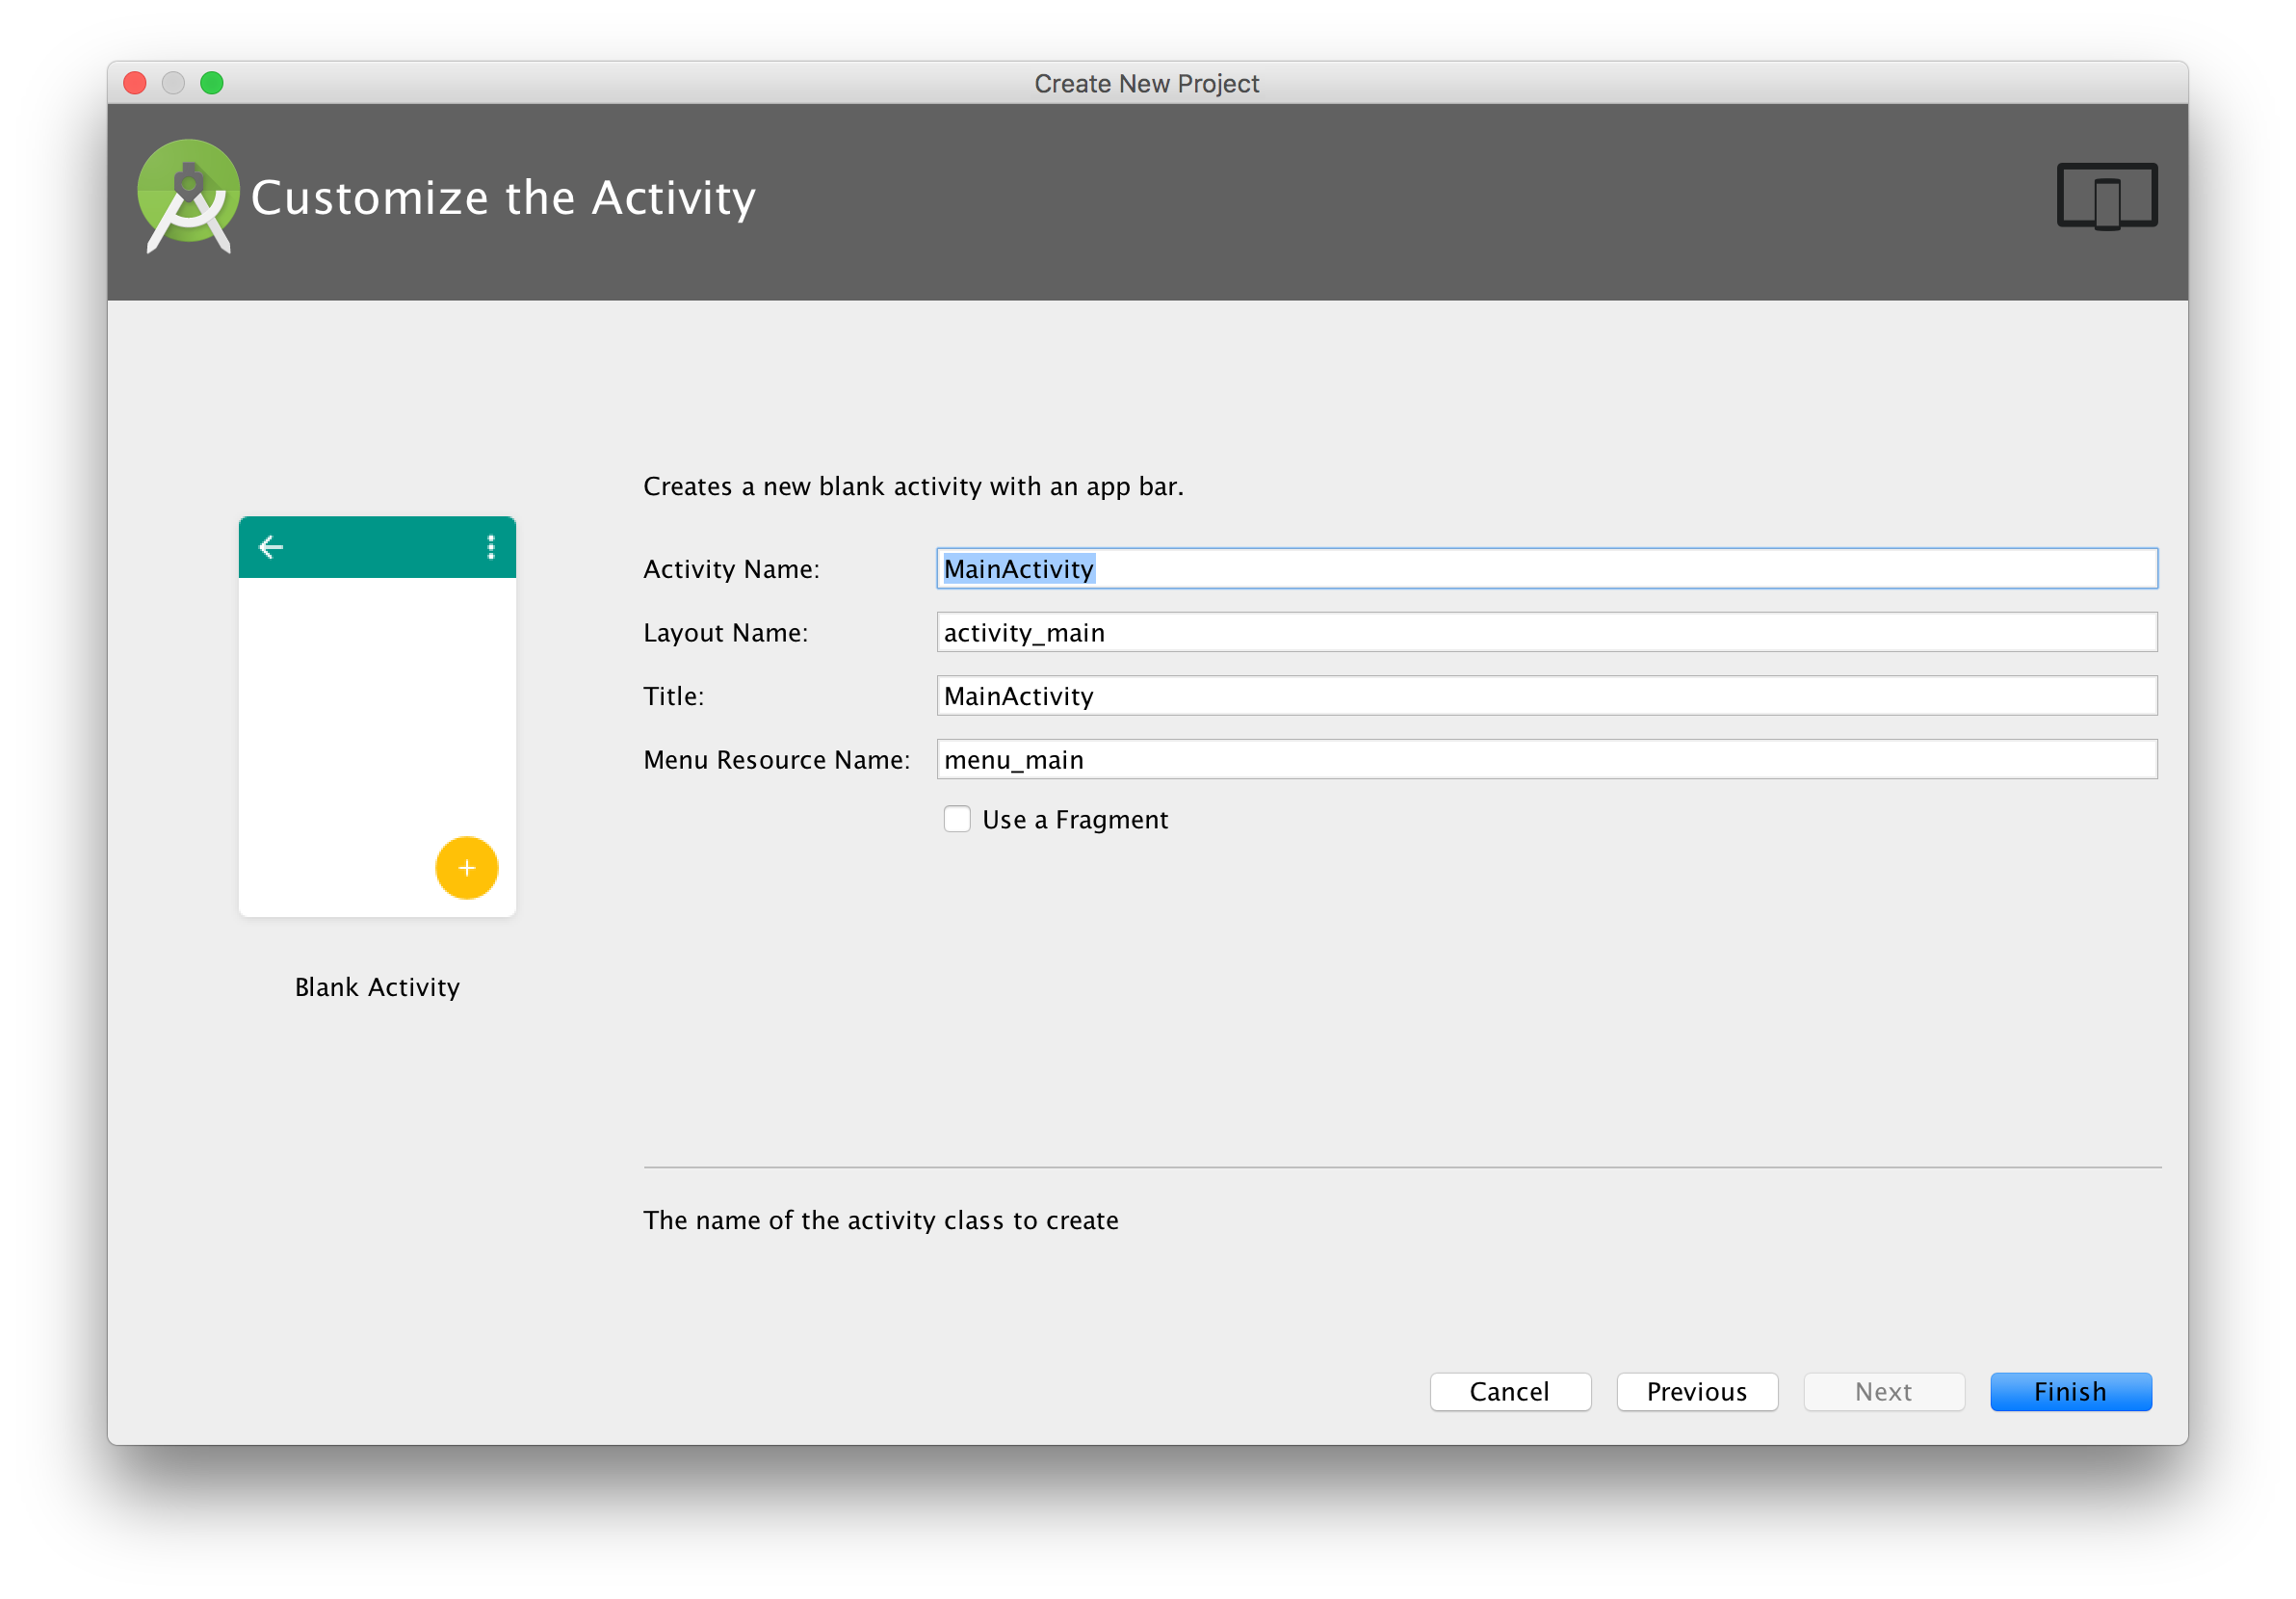
- Leave the Blank Activity settings as default and click Finish
If everything went as expected, you should see something closely resembling this:
At this point we have the framework in place for a complete Android application. In fact, we already have an application that will actually run! I realize that you may not understand a good portion of what you're looking at yet, and that's OK for now. Remember, one of our goals at this point is to make sure everything runs properly...so let's run this app! Click on the green 'Run' icon in the menu bar (the Play button beside the bug).
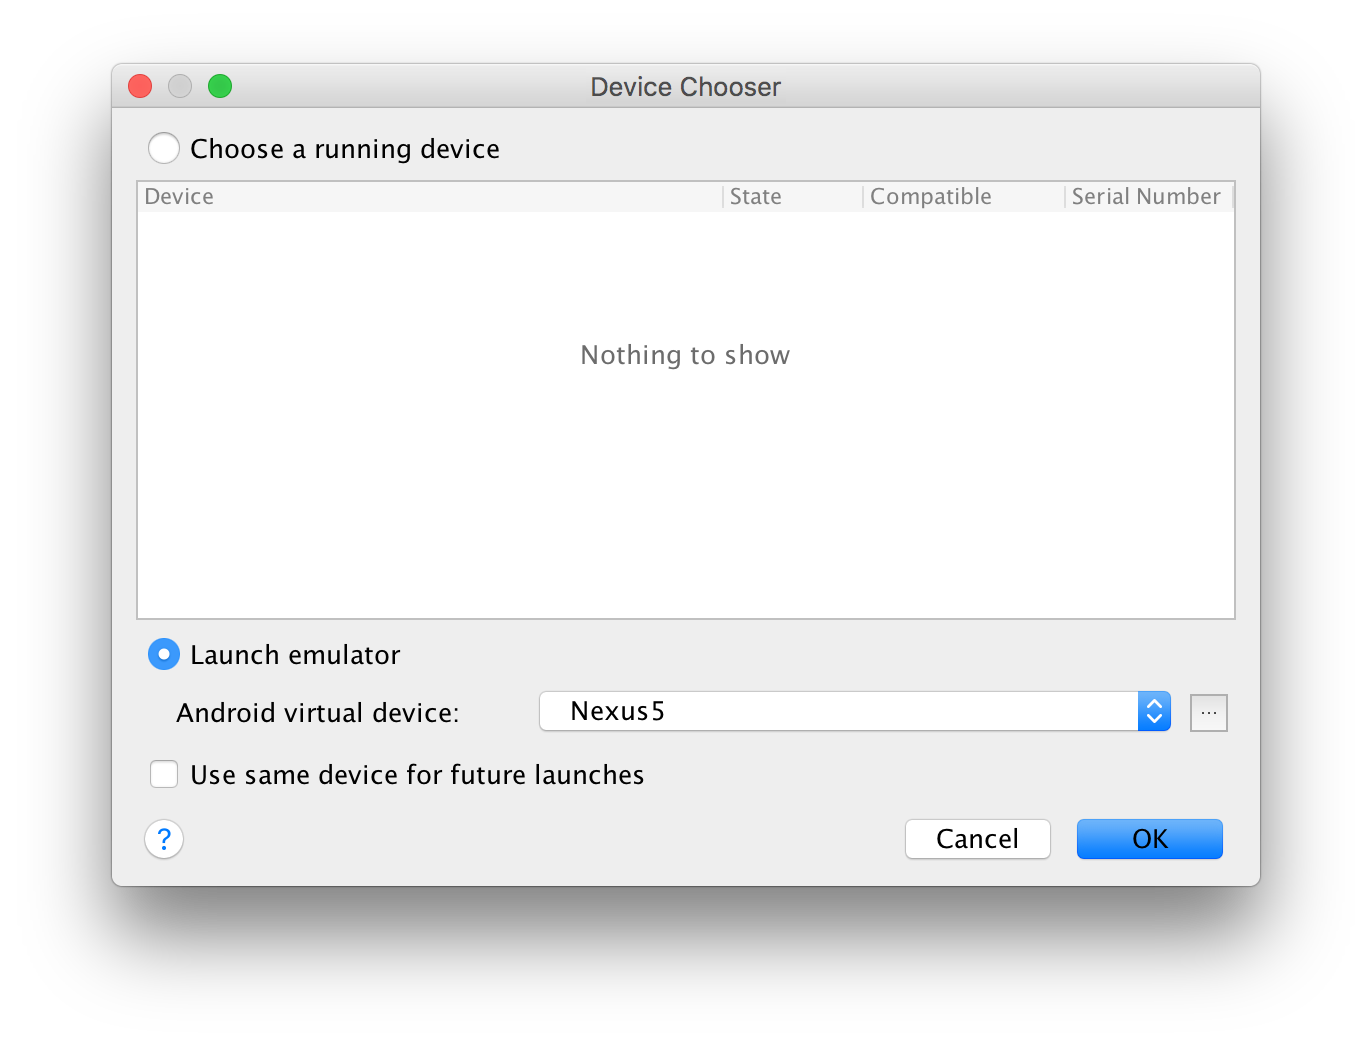
You will be given the option to choose which device to run your app on. We want to use the AVD we created previously, so choose it from the selector and click OK:
If everything is working properly, in short time you will see the fruits of our labor:
![[screenshot of running app in emulator lab2_4.png]](http://www.pepinonline.com/courses/course/resources/images/helloworld1.png)
Time For Change
Now that we have a running app, let's have some fun and make some changes.
- Leave the AVD running and go back to Android Studio.
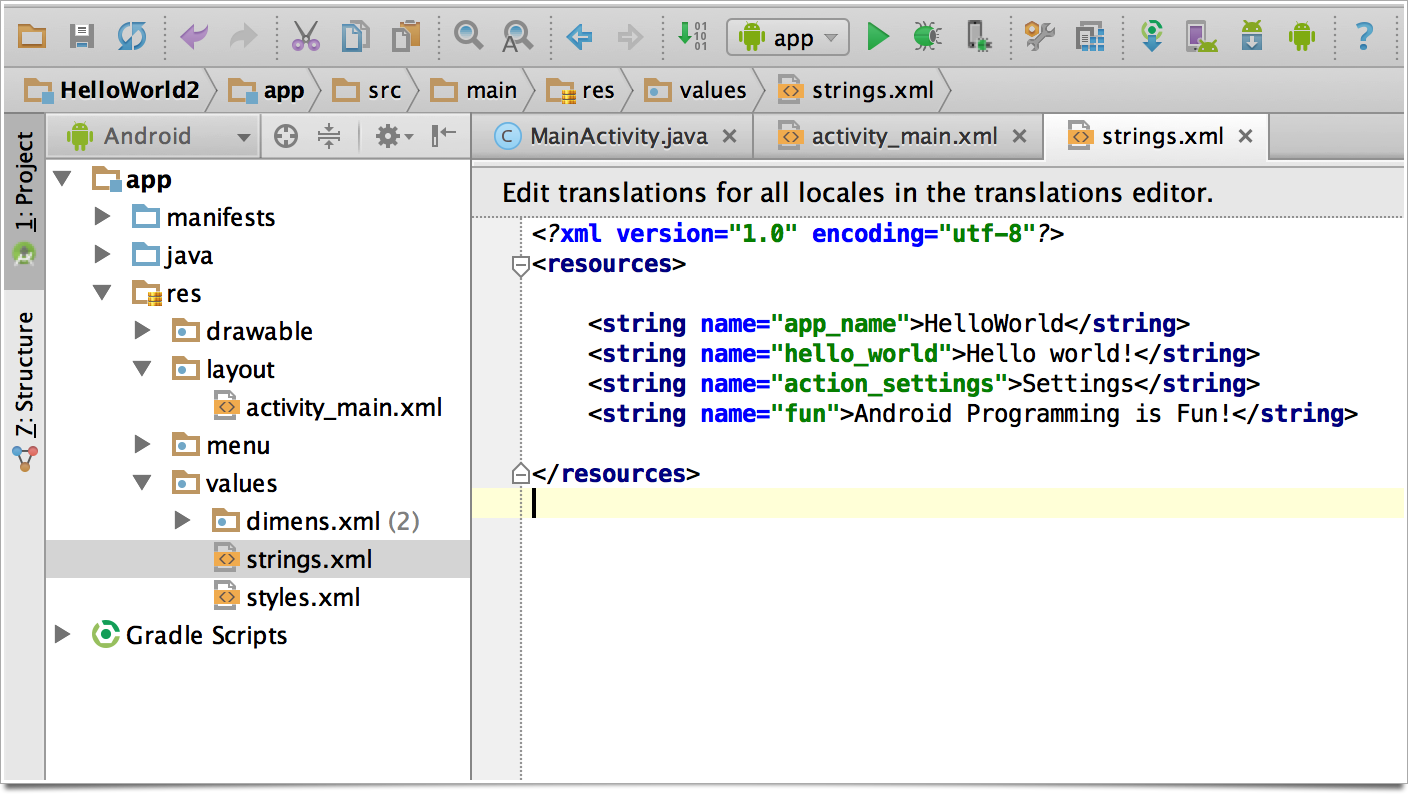
- Open res > values > strings.xml
- Add a new String with the following attributes:
- Name: fun
- Value: Android Programming is Fun!
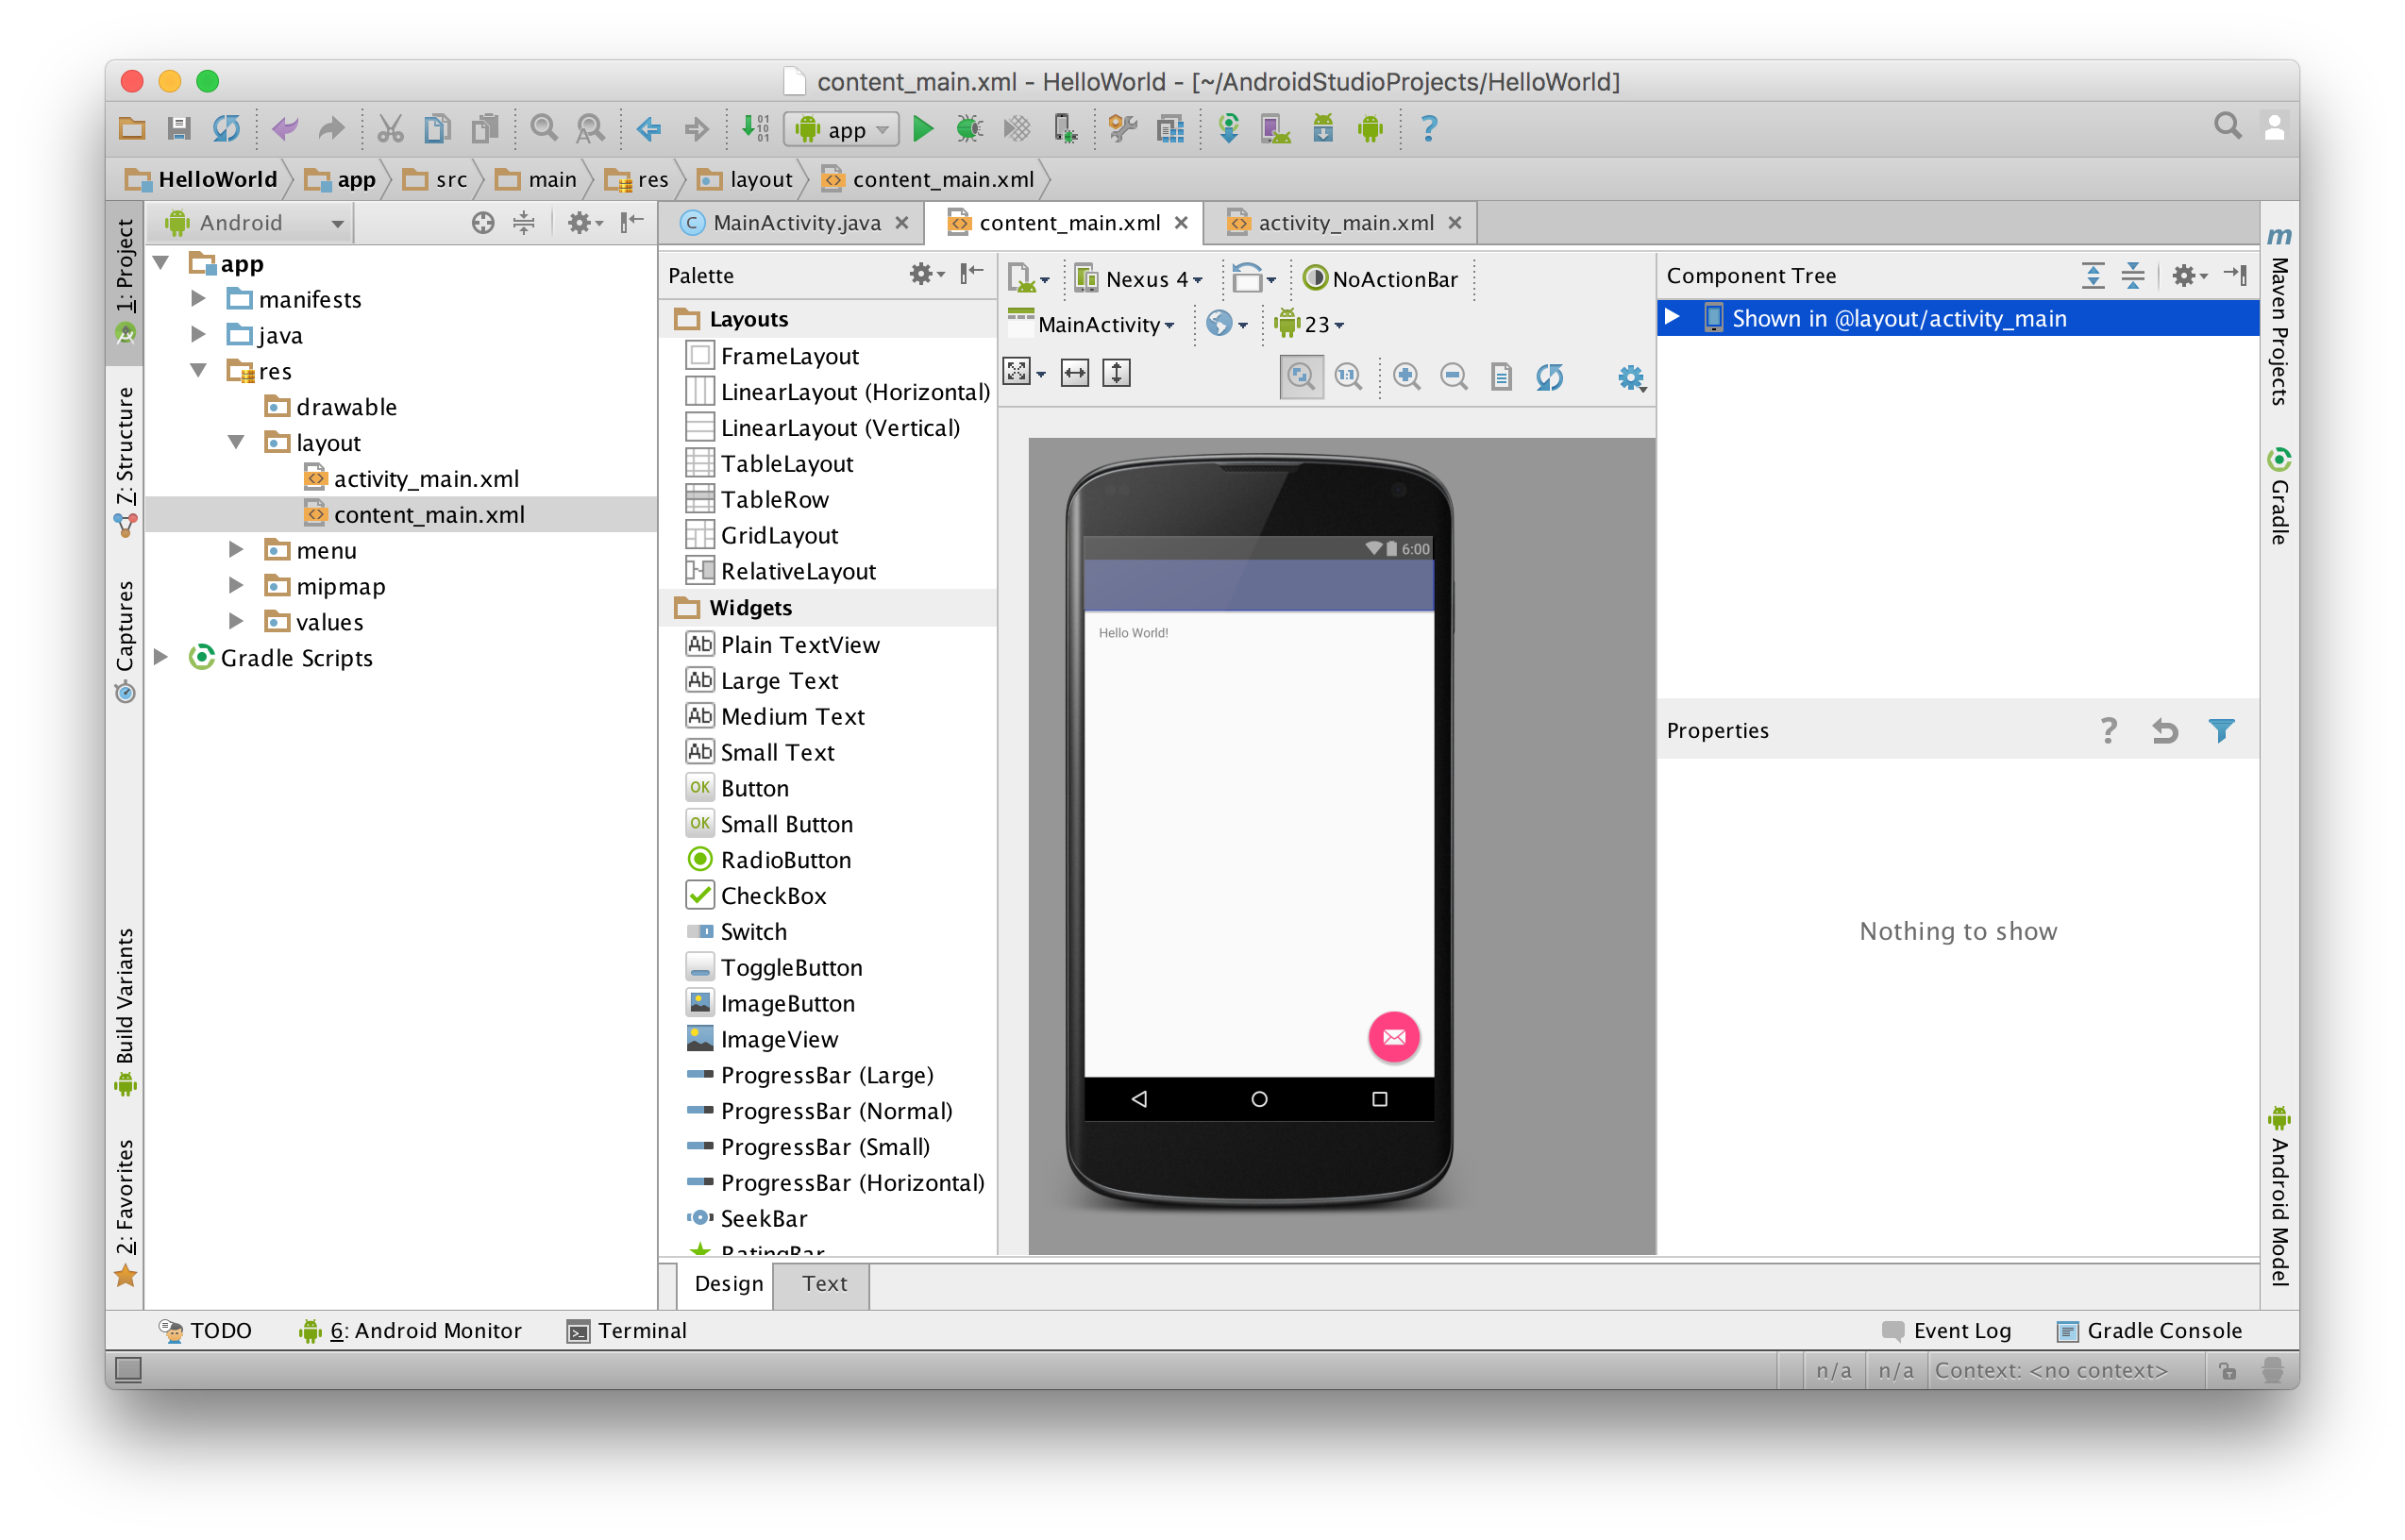
- Now open res > layout > content_main.xml
- Click on the Text tab at the bottom of the main window to see the file's XML code. This is the file that defines the content and style of the user interface.
- NOTE: we will do
mostall of our work in the Text view! If your XML is rusty, feel free to brush up now: http://www.w3schools.com/xml/
- NOTE: we will do
- Before we start changing any text, we should fix the code format if it's a mess!
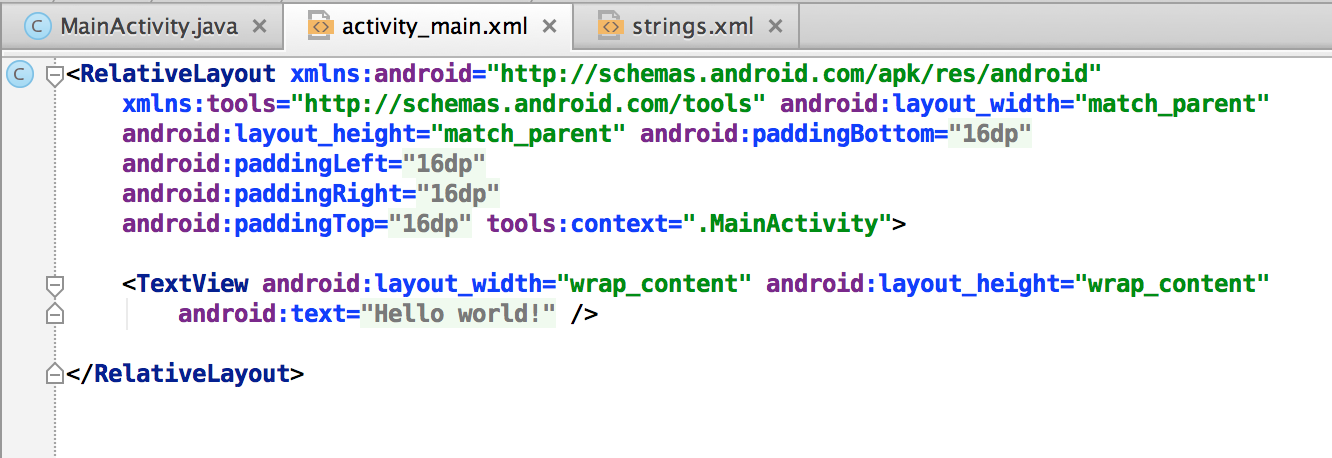
This is a Mess!
- In the top menu bar, select Code > Reformat Code...
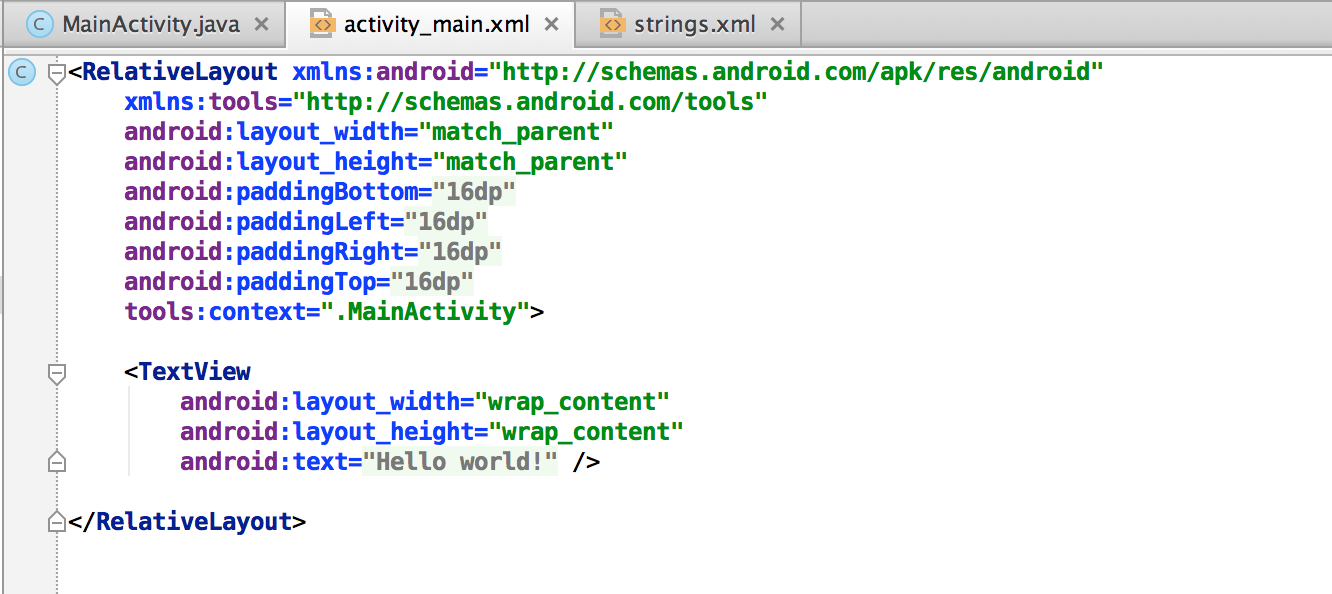
That's Better!
- In the TextView element, change android:text attribute value to "@string/fun"
- The @string/ syntax tells the IDE to look for a string resource named "fun"
- You can preview your changes in the Previw area to the right of your XML, or by selecting the Design tab.
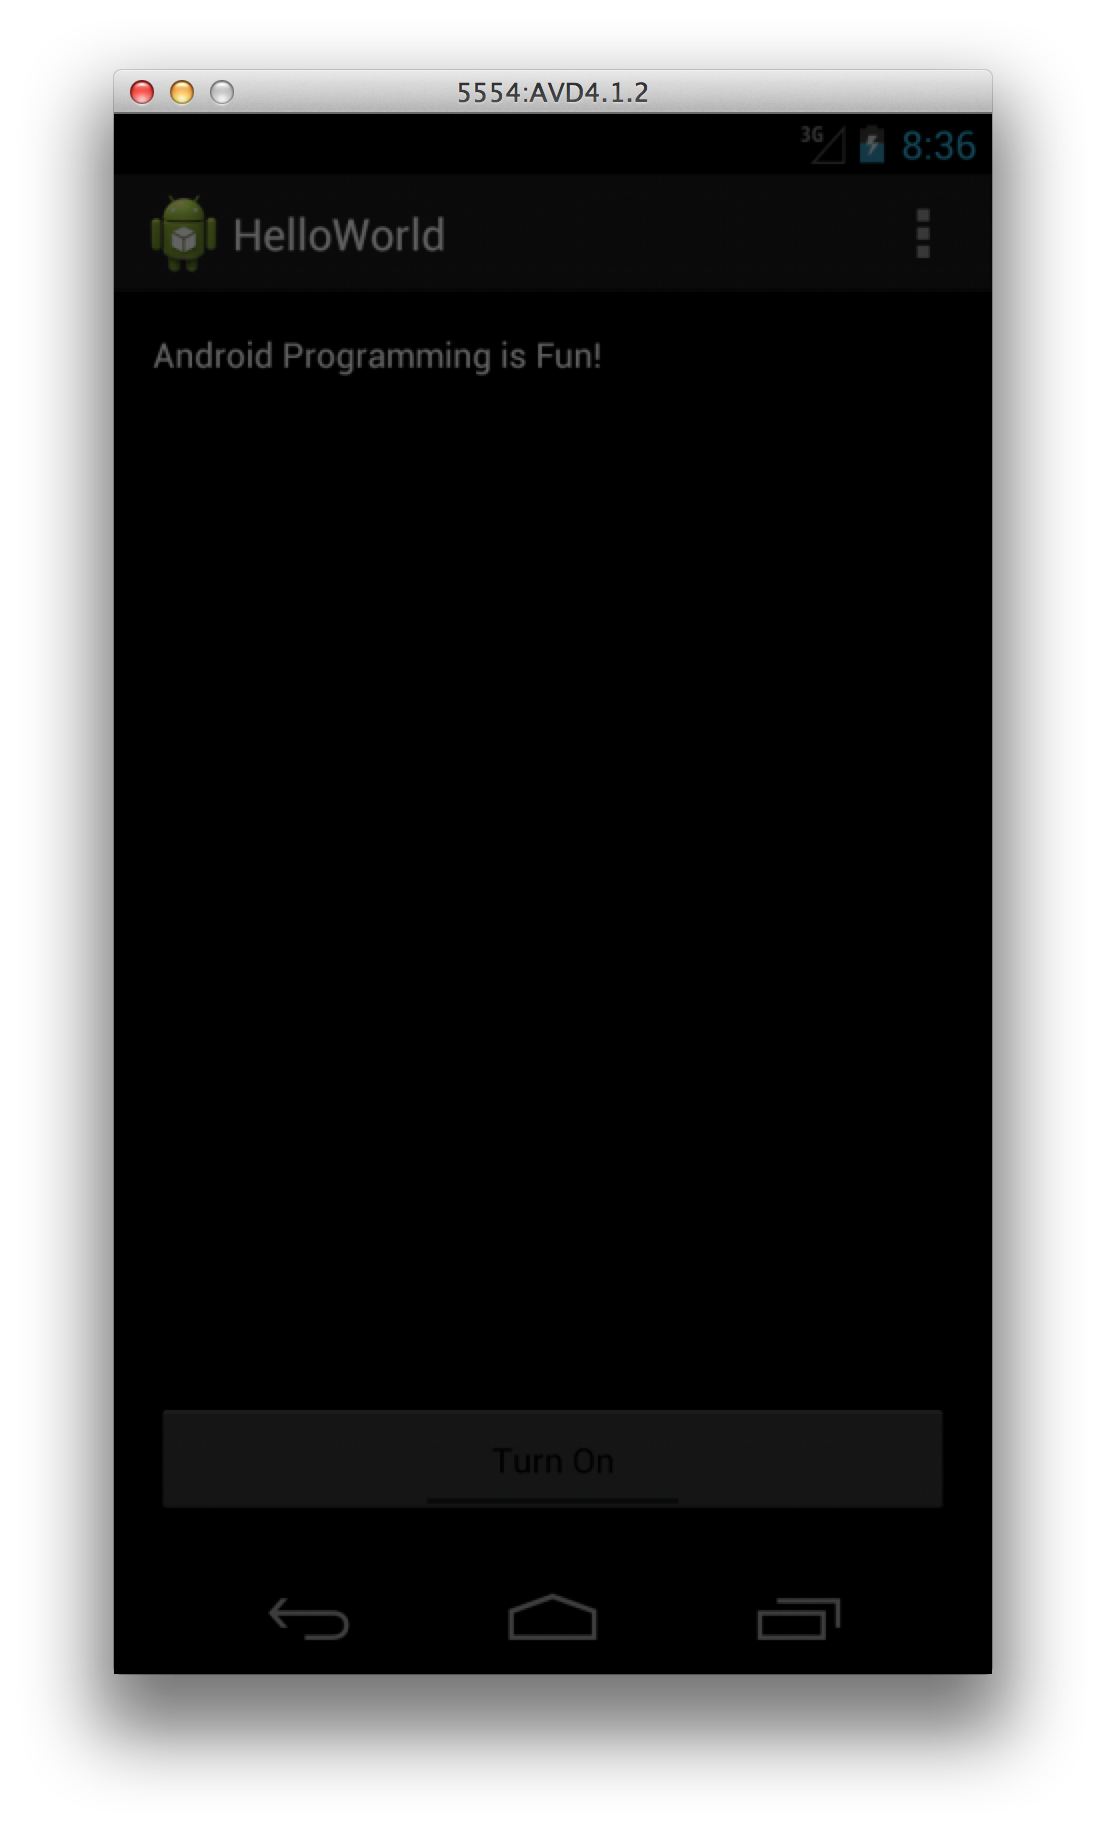
- Run the application again and observe the results in the AVD.
![[screenshot AVD running new program lab2_6.png]](http://www.pepinonline.com/courses/course/resources/images/lab2_6.png)
Let There Be Light!
Not too bad so far...but we can do better! Let's add a little bit of interactivity:
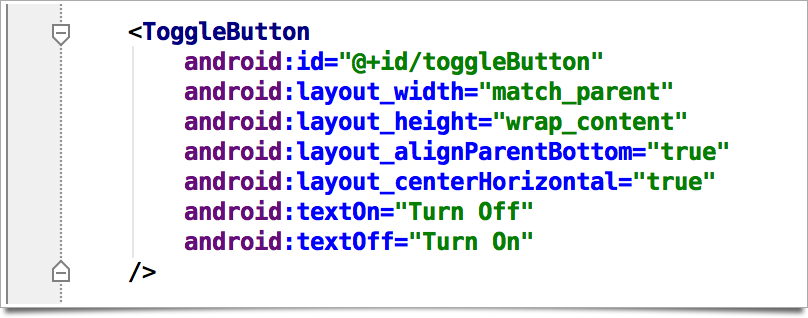
- Open the layout file again (content_main.xml)
- Below the TextView, add a new ToggleButton element:
- Now, in the RelativeLayout element (the root element in this file),
- add a new android:id attribute and give it a value of "@+id/mainLayout"
- add a new android:background attribute and give it a value of "#000000"
- The id property in a View gives us a way to reference a specific view in our java code.
- The background property defines...the background (OK, you could have probably figured that one out yourself).
Open MainActivity.java.
We want to make our app do something with the items in the layout file, so we need a way to reference them in our code. This is done similar to the way you might instantiate a new Java class. Modify the onCreate method to look like this:
@Override
protected void onCreate(Bundle savedInstanceState) {
    super.onCreate(savedInstanceState);
    setContentView(R.layout.activity_main);

    RelativeLayout mainLayout = (RelativeLayout) findViewById(R.id.mainLayout);
    ToggleButton toggleButton = (ToggleButton) findViewById(R.id.toggleButton);
}
Now that we have a way to reference our Views in the Java code, let's add some functionality. What's our desired end state? For this example, we're going to make it so that when the ToggleButton is tapped, the background color toggles between white and black. To put it another way, our app will "listen" for you to tap on the button, and change the color of the RelativeLayout's background. To do this, we need to add an Action Listener. Modify your onCreate() method again..this time we'll add the code necessary to capture the user clickign on the ToggleButton. Your code should look like this:
@Override
protected void onCreate(Bundle savedInstanceState) {
    super.onCreate(savedInstanceState);

    // set the layout file this activity will use
    setContentView(R.layout.activity_main);

    // define variables that point to views defined in our layout file
    final RelativeLayout mainLayout = (RelativeLayout) findViewById(R.id.mainLayout);
    final ToggleButton toggleButton = (ToggleButton) findViewById(R.id.toggleButton);

    // create an action listener for the toggle button
    toggleButton.setOnCheckedChangeListener(new CompoundButton.OnCheckedChangeListener() {
        @Override
        public void onCheckedChanged(CompoundButton buttonView, boolean isChecked) {
            if(isChecked){
                // We can do it this way...
                mainLayout.setBackgroundColor(Color.WHITE);
            } else {
                // or use hexadecimal color codes for more options
                mainLayout.setBackgroundColor(Color.parseColor("#000000"));
            }
        }
    });
}
That does it. All of the logic is in place...Now run it! Tap on the ToggleButton to see what happens...
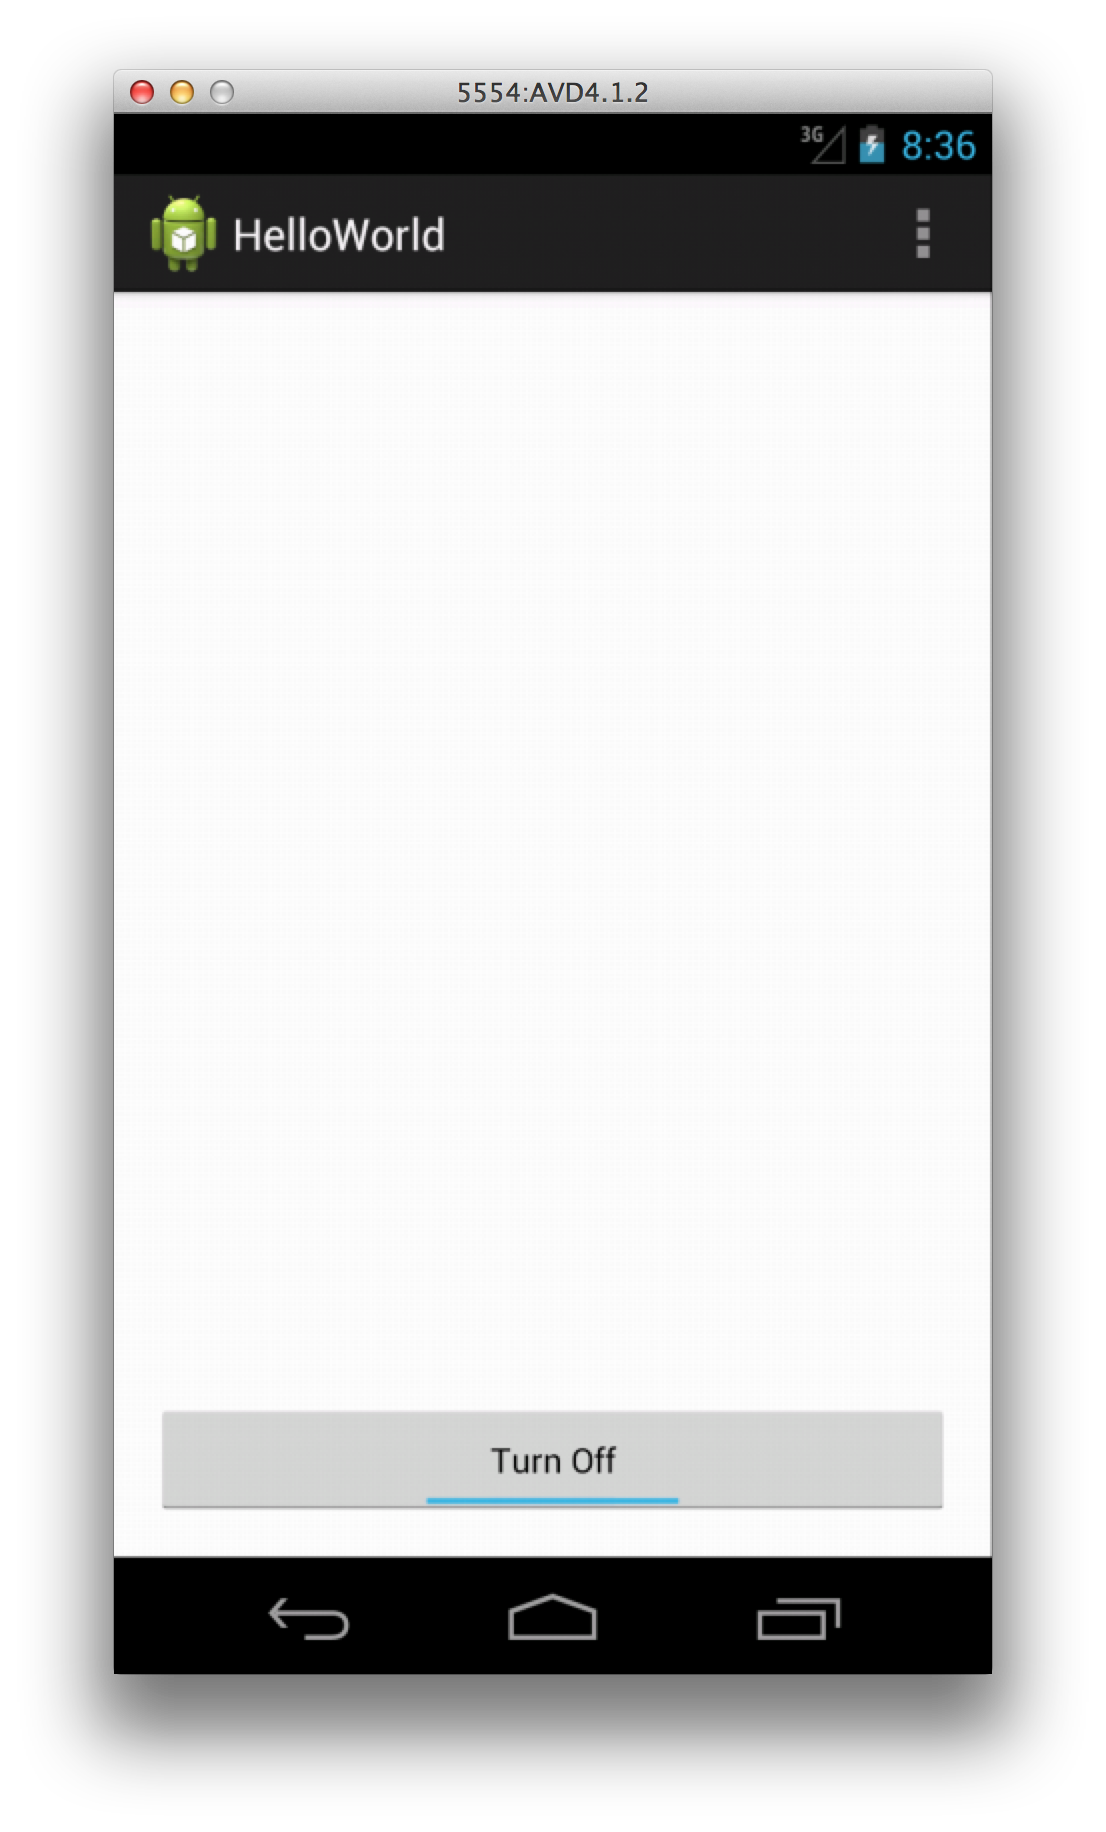
There you have it. We'll call this app "The Amazing Flashlight"®
Conclusion
We've touched on a lot of stuff , so let's recap. You have now been shown how to:
- Create a new Android Project in Android Studio
- Create predefined values in XML format
- Add Views to a Layout
- Reference Views in your Java code
- Use an Action Listener